


Fitting the restriction washers
+2
ScoldedCat
lncocks
6 posters
Page 1 of 1
![]()
 Fitting the restriction washers
![]() lncocks Wed Apr 11 2012, 21:36
lncocks Wed Apr 11 2012, 21:36
Hello everyone
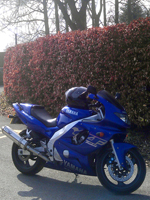
I recently passed my A2 motorcycle test and i need to restrict my 1997 thundercat.
I have bought the washers and insurance certificate and currently my dad and his friend (Who are both skilled bike mechanics)
are having trouble fitting the washers.
Has anyone tried doing this before and found the 'knack'? They said they have both restricted bikes before but it is the nature of the bike which is making it difficult as they cannot reach the carburetors to fit the washers.
If anyone can shed any light, that would be fantastic.
Lewis

lncocks- 1Bronze

- Status :
Online Offline
Number of posts : 8
Registration date : 2012-04-11
![]()
![]()
Re: Fitting the restriction washers
![]() ScoldedCat Wed Apr 11 2012, 21:37
ScoldedCat Wed Apr 11 2012, 21:37
Remove fuel tank and they're just there?
ScoldedCat- 2Silver

-
 Status :
 Online Offline
Number of posts : 195
Humour : This parrot is dead!
Registration date : 2012-02-15
![]()
![]()
Re: Fitting the restriction washers
![]() robertcains Wed Apr 11 2012, 22:25
robertcains Wed Apr 11 2012, 22:25
As above, Fuel tank off, air box off & after undoing the fiddly screws on the inlets the carbs will lift off, the washers just sit inside the rubber pipes just under the carbs.

robertcains- Admin2

- Status :
Online Offline
Number of posts : 2160
Humour : Lol. No chance!!
Registration date : 2009-01-10
![]()
![]()
Re: Fitting the restriction washers
![]() past-it Thu Apr 12 2012, 01:20
past-it Thu Apr 12 2012, 01:20
As Robertcains said plus the washers should have a hole in the middle of the disc and a small hole near one edge of the disc, this small hole should be at the bottom(ie 6 "o" clock position). Just remember to turn the fuel tap on when you refit the tank and connect the fuel level sensor wire 

past-it- 6Silver

- Status :
Online Offline
Number of posts : 357
Registration date : 2011-11-22
![]()
![]()
Re: Fitting the restriction washers
![]() YZFJohn Thu Apr 12 2012, 08:48
YZFJohn Thu Apr 12 2012, 08:48
Yep, it's a lot harder to turn the tap on down the road.
The Cat does seem to run for an amazing amount of time with the tap off (especially on tickover) considering it has 4 Carbs. to feed.
The Cat does seem to run for an amazing amount of time with the tap off (especially on tickover) considering it has 4 Carbs. to feed.
YZFJohn- 5Gold

- Status :
Online Offline
Number of posts : 1687
Hobbies : Job: IT/ Hobbies: Biking/ Fishing
Humour : Gradually Leaving me.
Registration date : 2011-06-13
![]()
![]()
Re: Fitting the restriction washers
![]() lncocks Thu Apr 12 2012, 10:41
lncocks Thu Apr 12 2012, 10:41
Hi Guys
Apparently the problem at hand is getting to the screws after the fuel tank and air box comes off. It seems they were put in at a tight angle and were struggling to reach them!
Apparently the problem at hand is getting to the screws after the fuel tank and air box comes off. It seems they were put in at a tight angle and were struggling to reach them!
lncocks- 1Bronze
- Status :
Online Offline
Number of posts : 8
Registration date : 2012-04-11
![]()
![]()
Re: Fitting the restriction washers
![]() past-it Thu Apr 12 2012, 14:04
past-it Thu Apr 12 2012, 14:04
Welcome to the world of the Thundercat  , could be worse it could be a Honda VFR400
, could be worse it could be a Honda VFR400
past-it- 6Silver
- Status :
Online Offline
Number of posts : 357
Registration date : 2011-11-22
![]()
![]()
Re: Fitting the restriction washers
![]() Mapman Thu Apr 12 2012, 23:16
Mapman Thu Apr 12 2012, 23:16
lncocks wrote:Hi Guys
Apparently the problem at hand is getting to the screws after the fuel tank and air box comes off. It seems they were put in at a tight angle and were struggling to reach them!
Hopefuly you've managed to get this sorted by now but I can understand where you are coming from as I had the same problem myself. It's best to use a torch and if possible a small mirror to try to fnd exactly where the screws are. Once you've done it the first time you'll find it's much easier than it actually is. I had to disconnect the wiring loom on the left hand side and get it out of the way to get at the far left screw for cyl 1 (or is it cyl 4
Once all the screws are loosened (and they don't need to be that loose) you might find the carbs won't lift off easily as the rubber will have taken a good hold of the alluminium if they haven't been off for a while. Gently rock the carbs back and forth while pulling upwards and they will free gradually. It's good practice to use a small amount of red dubber grease around the rubbers before refitting. This will make removal a lot easier next time around.
Good luck


Mapman- 2Silver
- Status :
Online Offline
Number of posts : 194
Hobbies : Cars/Bikes/Skiing/Golf/etc
Humour : Some
Registration date : 2011-06-27
![]()
![]()
![]()

 Similar topics
» 33bhp restriction
» Fitting a Scottoiler Touring Kit
» My winter project.
» Flush fitting indicators.
» Flush fitting indicators???
» Fitting a Scottoiler Touring Kit
» My winter project.
» Flush fitting indicators.
» Flush fitting indicators???
Page 1 of 1
Permissions in this forum:
You cannot reply to topics in this forum